
Articles
- Details
- Written by txlongshotb4
It would seem that over the last decade or so, long range rifle marksmanship has gained a lot of momentum within the civilian shooting community. Typical of any influx of interest in a given activity, the supporting markets will follow, and as such we have seen a huge increase in the production of heavy barreled target type rifles, long range optics, and all sorts of other peripheral equipment designed to aid the shooter in long range marksmanship. One of the products we are seeing more of these days are scopes that have been outfitted with mil dot reticles, and that is a subject on which I'd like to spend a little time here now.
The mil dot reticle can be a very useful tool to the long range marksman, but only if that marksman knows how to use it correctly. In this article ,I am going to explain how to "mentally break down" the mil dot reticle, and employ it's features to estimate the range to the chosen target.
The word mil in mil dot is a shortened term for the word milliradian. The easiest way to explain what this is would be to think of milliradians in the concept of the degrees of a circle. Milliradians are much like degrees, in that they are "slices of a circle". Where there are 360 degrees, or "slices" in a circle, there are 6400 milliradians in a circle. This allows for a much finer increment of measure when dealing with arcs, particularly over a long distance.
Mils are not a new concept in the world of accuracy. The sniper community borrowed this bit of knowledge from the artillery community, who has been using it as a means to accurately rain hell on our enemies for over a century. Since a degree is such a large "slice" of a circle, the artillery guys needed something a lot more precise...firing a howitzer even one degree off course will result in an impact several hundreds of meters off of target at the ranges these weapons are capable of. As such, the milliradian has been the go-to for accurate gun adjustment and accurate artillery fire for generations of cannon jockeys. Somewhere along the way, some wise guys got tired of saying and spelling milliradian, and so the term mil was coined, and it stuck...pocket protector toting scientific lab tech folks might still like to say milliradian, but gun toting cavemen like me are just fine with mil.
Back to the reticle, the second word in mil dot is dot. Take a peek through the reticle, and it will be immediately apparent to you where the word dot comes from. For those of you who don't have a mil dot reticle to look at, it looks like this:
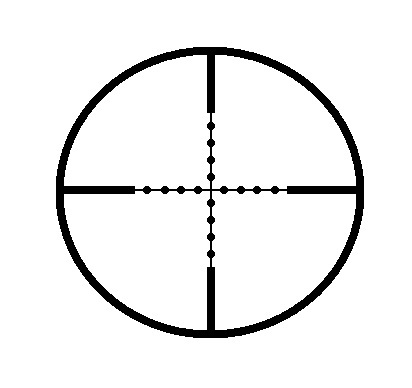
As you can see, the reticle pattern is made up of a standard duplex, on which has been arranged a total of 16 mil dots., configured on the reticle as shown.
Now, to bring the two words together into one entity, we have the mil dot. Mil dots are not from the artillery world, but rather a creation of our own design. (and by our I mean rifle shooters.) With the proper application of the mil dot formula, which I will cover, a shooter can obtain a very good estimation of the range to a target that is otherwise unknown. The first thing to know is what this reticle actually represents, in terms of measurements. Take a look at the image below...
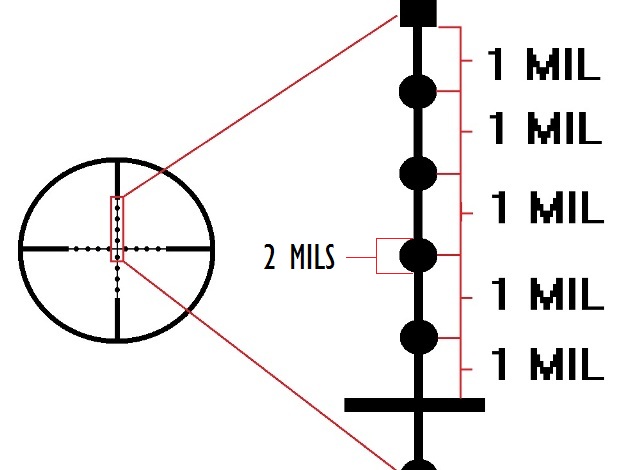
This is an expanded section of the reticle's vertical stadia line. As indicated, the distance from the center points of each dot, (and from the center of the reticle to the center of the first dot) is 1 mil. Also, the diameter of each dot represents .2 mils. Notice that is .2 and not 2.
Let's go back a bit, and look at what a mil represents in terms of measurement.
Mils relate to range in much the same way as minutes of angle (MOA.) relate to range. Minutes are expressed as being a rough distance of 1 inch at 100 meters. This measurement expands, however, as the range increases. Thus, a minute of angle represents 1 inch at 100 meters, 2 inches at 200 meters, 3 inches at 300 meters, and so on, respectively.
Mils follow the same pattern of behavior as the range increases, but they represent a much wider area of measure. A unit of one mil represents 3.438 inches at 100 meters. You can stick with that, but I like to simplify things a bit, and call it 3.5 (this makes the math a lot easier to deal with, rounding it down to the nearest half.) Thus, one mil at 100 meters represents 3.5 inches , 7 at 200, 10.5 at 300, 14 at 400, and so on. (see illustration below.)

Now let's return to that reticle break down. Remember that we've established that from the center of one dot to the center of another represents a unit of 1 mil. This is where things get a little tricky, and if your vision is not the best, it can get downright impossible. To break this reticle down further, you have to be able to see what isn't actually there. You must now be able to "mentally break down" each unit of one mil into tenths...see below.
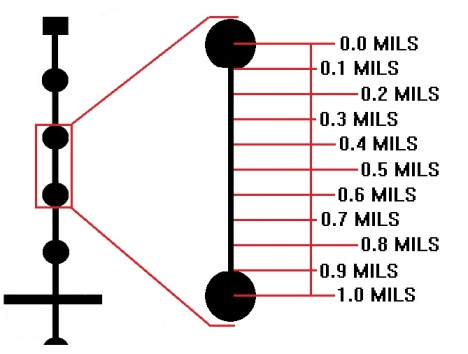
Notice that in this illustration, this section of the reticle representing 1 mil, from the center of one dot to the center of the next, has been broken down into tenths starting from the top and moving down. Anyone out there with a mil dot scope can immediately see the problem with this...the scale of the reticle is so small that being able to precisely imagine these increments is very difficult. This technique is just like shooting-it takes a lot of practice to get it right, and constant application to maintain proficiency. The payoff to all of this work, however, is that a trained eye can estimate range accurately out to 1,000 meters and beyond, and obtain first-round hits most of the time.
Having explained how to break down the reticle into it's incremental measurements, let's look at how we apply this information to a target.
In addition to the working knowledge of breaking down the reticle, there is a bit more information needed in order to estimate range to the target. Unfortunately, this next factor into the equation isn't always the easiest bit to obtain...you need to know the size of your target in inches, and you need to be pretty much spot on, especially as the range increases.
For target shooters, this isn't a huge deal. All the target shooter needs to do is simply measure the size of the targets he or she will be shooting at, prior to placing them in the field. For tactical shooters who have the task of eliminating enemy personnel, it can be a bit more tricky. As we all know, there is no one-size-fits-all dimension for human beings. There are some basic guidelines, but everyone is built a bit different. To augment this information, tactical shooters tend to collect data on objects that are commonplace within the environment that they are operating in. For example, when I was in Iraq, I would often see the same make and model of truck (there seems to have been about 20 billion Toyota type pick up trucks, all painted white with a red pinstripe sold in Iraq) So I measured the diameter of the tires of these trucks as soon as I could get close enough to one to do so. I also measured the height and width of the bed, the windshield, the tail gait, etc. I would also measure the average dimensions of door openings, windows, etc. I compiled a chart of this data in a note book I carried with me at all times. I could then usually find at least one of these object within relatively close proximity to my intended target, and use that to get a good estimation of the ranges I was working with. For deer hunters, unfortunately the task is daunting. Neither deer nor the trees they hide in fall into a certain dimensional measurement, as they too are all different...so unless your deer is standing next to a feeder that you happen to know the dimensions of, in inches, you're pretty much S.O.L...odds are, you already know the range to your feeder anyhow.
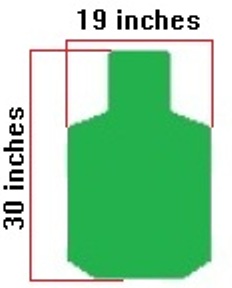
For the purposes of this instruction, let's assume that our target is a standard military type (E-type) silhouette target. These targets measure 19 inches wide by 30 inches tall...
Now let's take what we've learned about the breakdown of the reticle and super-impose that over our target...
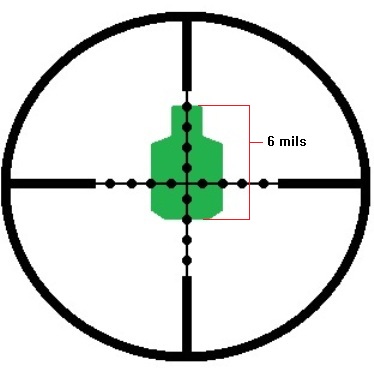
This illustration represents what the shooter sees when a target has been acquired with a mil dot reticle. Notice that this target is measured as being six mils tall, from the center of the top-most dot at the edge of the "head", to the second dot from center at the bottom edge, for a total of six mils. This is the final piece of data we need with which to extrapolate our target's range using the mil dot formula, which is as follows...
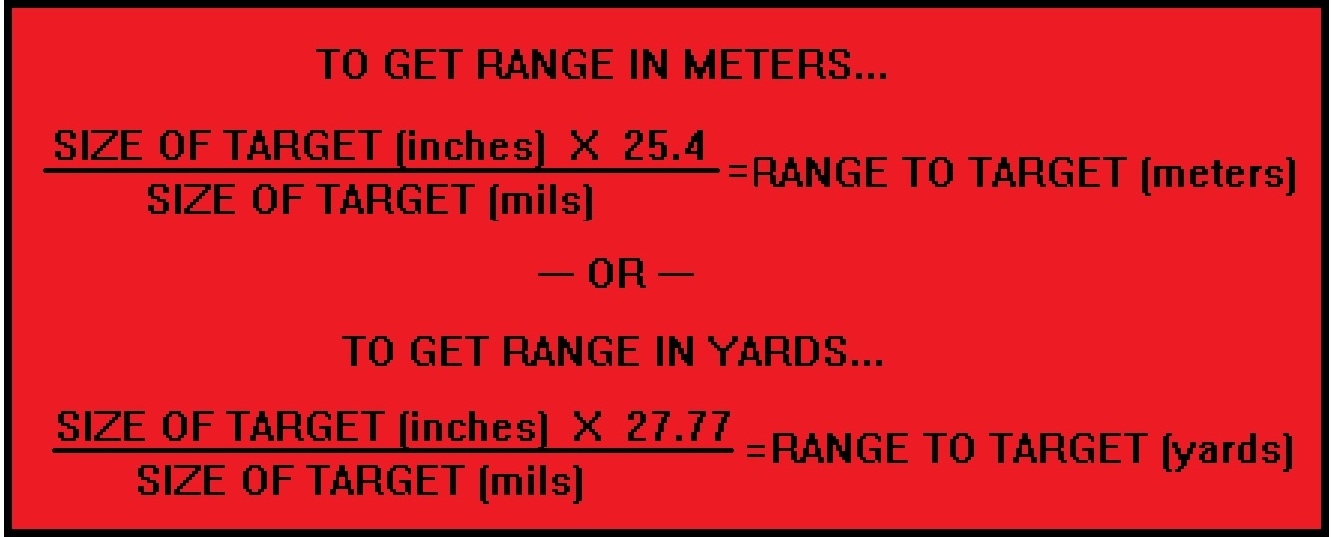
As stated in the illustration above, the shooter must now multiply the size of the target in inches, which in this case is 30 inches (height of the target) and multiply this number by 25.4 to obtain range in units of meters. If the shooter wishes to obtain this range in units of yards, then the target's size must me multiplied by 27.77 .
In our example, the target height is 30 inches. When multiplied by 25.4, we get 762. This number is known as a "constant." as such, it will never change. Hence, it is a good idea to make a chart with a column on the left, starting at 1, and ending in, say, 100. This column represents inches. In the column on the right, go ahead and multiply each of these numbers by 25.4, and write down the corresponding constant in this column. As an option, a third column can be made, and in this column the constants for inches multiplied by 27.77 for yardage constants can be recorded. This list can now be added to your data book, range bag, or even taped to your rifle's butt stock and used as a quick reference tool.
Back to our example, we've now determined that our constant is 762 (or 833, when multiplied by 27.77 for yardage increments.) We must now divide this constant by our "target size in mils" which we have determined by measuring the target size with our mil dot reticle. Remember in the example above, we decided that our target was "milled" at 6 mils...so lets divide our constant of 762 for meters by 6. This gives us a figure of 127, which is the range to our target in meters. when divided by 833 for yards, we get 138.8, which we will round to 139, for a distance of 139 yards to target.
Now let's look at another example...
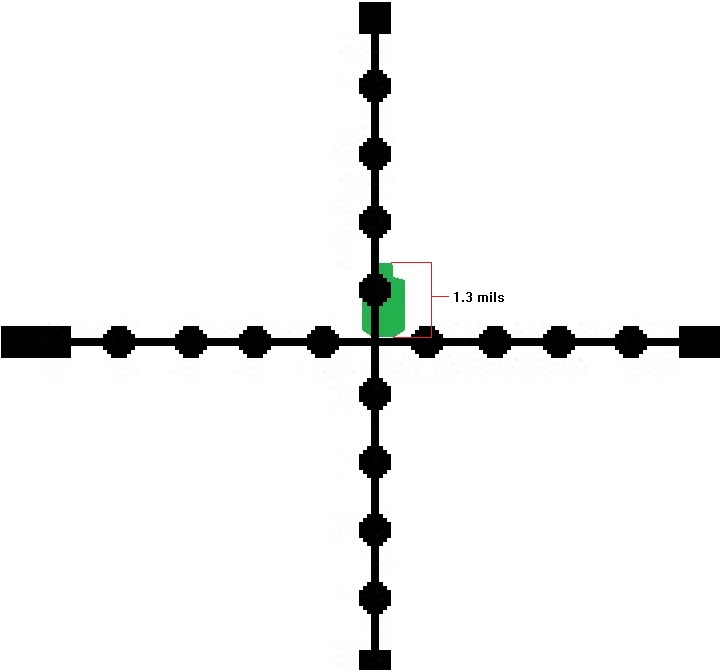
Notice that in this example, our target is now reading a mil read of 1.3 mils. This is an instance in which being able to accurately break down the mil dot reticle into tenths of mils will come into play, and I will now explain why it is critical to be as accurate as you can with this measurement.
Let's assume that when we mil our target, we mis-read the reticle and decide that our target is reading to be 1.5 mils tall-an error of only .2 mils, or the diameter of one mil dot. Look at the two equations below, where I will extrapolate range in meters by both our actual read of 1.3, and again in our erroneous read of 1.5;
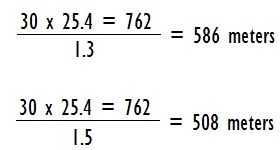
Notice that a deviational error of only . 2 mils has created an error in the extrapolated range of 78 meters. Given the ballistic trajectory of most rifle rounds at this range, this error will most likely result in a complete miss of the intended target. The margin of error that results from mis-reading a mil read expands over range. For example, let's assume that we mil a target at .5 mils. Let us also assume that we have erroneously missed the actual read, this time by only .1 mil, for a read of .4 mils.
As can be seen in this example, an erroneous read of merely .1 mil has given us a range error of 381 meters. An error of this degree will obviously result in a huge miss, and is a good indication of why it is absolutely critical to accurately read the mil dot reticle, especially when dealing with extremely long ranges. As I am sure you've deduced already, this method has a lot of issues. Not only is it subject to human error, but it is also somewhat slow, as most of us cannot simply run the formula in our heads on a moment's notice, if at all. (I use a simple pocket calculator by the way.) If your target is on the move at all, then by the time you get this formula worked out for a range, you will discover that your target is no longer at the range you've extrapolated. The laser range finder is by far the best and fasted method that exists currently, but the mil dot reticle and it's formula are still functional tools, and a good thing to know, should your range finder break, run out of battery power, or get lost in the field.
As with any subject you might want to learn, it is always a good idea to test yourself. As such, I am including a few equations for you to work out at home. I will list the target sizes, along with a random mil read, and let you guys use the mil dot formula to determine the corresponding ranges. I will post the answers at the bottom of this article, in both meters and yards, to check your answers against. So grab yourself a calculator, and give it a shot...
TARGET 1 - 30 inches tall, mil read of 2.7
TARGET 2 - 21 inches wide, mil read of 3.1
TARGET 3 - 36 inches tall, mil read of .7
TARGET 4 - 10 inches tall, mil read of 1.1
TARGET 5 - 50 inches wide, mil read of 1.8
There are a few "situational" considerations to take note of when milling a target with the mil dot reticle. Obviously, a target that is partially obscured, by tall grass, as an example, will give off a false mil read because only part of the target is exposed. Another thing to think about that is not as readily obvious is the angle at which a target is presented. A flat object such as a steel ringer target will appear to be narrower than usual if viewed at an angle. A good example of this is to view a standard open door, and notice it's proportional size as compared to the door's opening...see below;
Notice that the door appears narrower than it actually is, due to the angle at which it sits from the point of view of the viewer. This is the same effect observed when viewing a target at an oblique angle to the shooter. This phenomenon will obviously create a false mil read if the shooter uses the horizontal axis as a base for the mil read. This is why the vertical axis of the target should be used whenever possible. It is also desirable to use cylindrical objects such as barrels or poles for obtain horizontal mil reads, as a cylinder's overall dimension will not change regardless of the angle at which viewed.
It is a good idea, when time permits, to use multiple mil reads off of the same target to estimate range. In other words, mil the target vertically and horizontally, and work up the formulas for both reads. Then compare the extrapolated ranges and see if they are the same, or at least very close. By this method, you are effectively double checking your work for accuracy, and may save yourself from an erroneous shot.
It should be mentioned that most scopes with variable magnifications will not adjust the size of the reticle when the magnification is changed, and that the reticle has been scaled to accommodate the highest power setting on the magnification, in most cases. A good way to determine where your reticle is scaled to throughout your magnification range is to fabricate what is known as a "barber's pole." To construct one, obtain a straight board or a section of PVC pipe, and measure/mark out increments of 3.5 inches along it's length. Wrap tape that contrasts to the color of the pipe/board around every other marking, so that the tape bands are 3.5 inches wide and 3.5 inches apart. Now measure off a distance of 100 meters and stick one end of the barber's pole into the ground at the 100 meter line. Now return to the other end of your 100 meter line and acquire the barber's pole in your scope. Adjust your focus until the sight picture is as crisp as possible, and while you hold the rifle steady, have a friend slowly adjust your magnification until each mil dot indexes the tape bands at the edges. Make note of the magnification setting your rifle is now set for-this is the effective magnification for your mil dot reticle.
Well folks, that's it in a nutshell. The mil dot reticle has other applications as a crude bullet drop compensator when the appropriate data is collected and logged, but that is a subject for another write. There are also some methods and techniques for employing the mil dot range estimation formula that can make it a bit more "user friendly"...particularly in a real-world tactical scenario-but again, I'll save that one for another time. Leupold has also created a great modification of the mil dot reticle called the tactical milling reticle, which breaks down the measurements even further...but that is a post for another time as well. For now, Good luck in all of your shooting endeavors, and everything that you do.
MILDOT EXCERSISE ANSWERS...
1- 282.2 meters, 308.5 yards
2- 172 meters, 188.1 yards
3- 1,306.2 meters, 1,428.1 yards
4- 230.9 meters, 252.4 yards
5-705.5 meters, 771.3 yards
- Details
- Written by P. St.Marie
Requirements for a CC Permit by Sheriff Departments, City Police and States vary widely and wildly. Wildly because in some venues there seems to be little connection between self defense and a field hunting course to obtain a CC.
In the field, never carry a rifle with a chambered round. Always keep the muzzle down. Never crawl through a fence with your rifle. Congratulations. You passed.
Responsibility for being fully qualified to obtain a permit and carry a sidearm rests solely with you, the applicant. You are responsible for the depth and pertinence of the course, after all, the choice of a teaching methodology is something upon which you must decide. Its not only your right, but its more importantly your duty to seek the proper teacher and course methodology to ensure your own safety both in real life and in the courts should that be your misfortune. Selecting the right course is the first and probably most important step you'll take in your quest for a CC Permit.
There are many approaches to teaching self defense employing the use of a firearm, be it pistol, revolver, shotgun or rifle. There are most certainly more than one good approach, but the end result should always be the same. A knowledgeable, competent and aware CC candidate, well schooled in every aspect of firearm and personal responsibility. You should most certainly interview your prospective teacher as if he/she were a job applicant. Interviewing a self defense instructor is by far more important than interviewing a salesman, waitress or a structural engineer. Upon that interview and acceptance of an instructor will potentially hang the rest of your life.
I'd like to give you the basics of what a CC course should contain. There may be instructors who require more or less, but the end result should be the same.
My course of instruction begins with a two way interview. The candidate should be asking me any and all questions to determine my qualifications, approach and expected attitude. I will be asking the candidate a number of key questions to determine that I am comfortable with his/her state of mental preparedness for a live firearms course. Some of the questions might be leading questions to determine the candidate's true purpose for wanting a CC. In my history I have most definitely turned down candidates for what I consider to be bad or cavalier attitudes. Its my right to determine fitness as it is theirs to determine my qualifications. If I certify you, its my responsibility to the Sheriff to give him truly qualified applicants.
Classes begin with required reading. I typically use the old Ayoob book, In the Gravest Extreme. Discussion of the book contents always follows, and when I determine the candidate has a firm grasp of potential negatives and the legal ramifications that can be potential life changing events, I move on to firearm introductions with a side trip of another required reading, Jordan's "No Second Place Winners"
A range that allows users to check out various sidearms is greatly preferable. I never recommend a specific firearm other than to point out that a snubby revolver might be easier for a lady to carry in her purse. Proven revolvers have virtually a zero FTF, and by "proven" I mean a revolver and caliber that's been successfully in production for a long time. For anyone, never less than a .38 with a +P and up being preferable. (Although it appears that I'm going to take a personal "flyer" at the new .327 Magnum just for fun) I know, I know.
If a candidate has no access to a pistol loaner range I discuss the reality of a suitable revolver or semi-auto for purchase. This may include a number of personal factors as to method of anticipated carry, comfort/size of the caliber and budget. Personal strength and recoil factor into the decision making equation. My own feeling is that a revolver is the correct sidearm for anyone who has no practical firearm experience. Semi-autos are an inherently more difficult tool to master for the complete novice. If an experienced shooter appears to have issues with semi-auto function during the course I require a switch to revolvers. All attention should be focused on the issue of learning and not on the function or periodic failure of the firearm to feed, extract or eject.
Practical field instruction begins with lessons in Point of Vision shooting. The candidate is taught how to make paraffin loads for his/her sidearm. This allows them to practice at home in the garage or even in the house. we take a nominal 40 cases, drill out the primer pockets to 1/8", notch the rim with a file (to avoid mistaking the brass as re-loadable with powder and projectiles), and size the brass. Paraffin is then melted in a shallow pan to a depth of a nominal 1/4to 3/8" deep (depending on caliber) . The cases are then placed nose down in the paraffin and allows to cool until hard. Once cool and hard ( a refrigerator helps) they are gently rocked side to side and removed. By this time the candidate has already secured a Lee or RCBS hand primer in the appropriate caliber. The cases are primed. A piece of cardboard or softer material is set up with a black Magic Marker, life sized profile of a human. Using plywood is not recommended and will startle you with the impact of the paraffin. Its far more than you imagine. No... the paraffin won't goo up your rifling. After the session, collect the paraffin on the floor and target and then using a brass brush and a swab with alcohol leaves the lands/grooves/ clean and free of wax if there is any. The wax won't melt as it passes down the bore. Dwell time is very short and the primers cause no appreciable heat.
The next step is one that must be experienced to fully understand. The applicant is taught to hang the pistol at the side, raise to a natural height midway between stomach and chest, bring both hands together, focus on the chest area, squeeze and fire, fluidly in one motion. Many succeed quickly, but for most it takes practice. Lots of practice, thus the economy of wax loads. Raise, left hand over the right on the pistol grip, center, squeeze and fire. Over and over until its second nature. If the projectile hits consistently too low, some applicants learn to simply "look higher" IE: at the shoulder level or even the neck level of the foe. If their point of vision impact is naturally low, they simply look higher. Understand that these wax projectiles will travel an easy 25 feet dead true, just as true as a lead projectile. Make no mistake. The impact of the wax projectile is enough to penetrate and kill as very short ranges.
Once a true point of vision exercise is natural and accomplished every time, the applicant begins to draw from the holster, purse or bag, whatever the normal carry vehicle would be. Sound odd? Nope. If she's going to be carrying in a purse, then the purse is from where she will draw. At this point a number of women may determine they want to have the option of carrying behind the right hip. In either case, practice now shifts to that mode.
The next step will be "reflex" shooting. Learning to use one hand and hit a body center every time. When a quick reflex to a danger is suddenly required, this exercise is paramount. This exercise is less accurate for some and very accurate for others, but both must be learned. Wax projectiles, weapon hanging at the side, raise and fire and then on to drawing from the carry mode. Speed has nothing whatsoever to do with the course. Speed for the candidate comes later and on their own. No speed drawing is ever allowed on our premises. We do recommend a few on-line videos for those who intend to learn proper speed draw methodology.
Now comes the live fire course. We always begin with a .22 pistol and the (by now) familiar two handed raise, center, squeeze and fire exercise followed by the reflex application. The final part of the live fire course is utilization of the candidate's own firearm in the same, very familiar sequence. Drawing from the carry vehicle is always done slowly and smoothly. No quick draw on premises.
By this time we've already covered (with the applicant) why the applicant should avail him/herself of every opportunity to avoid the confrontation. Walking, talking, running away (if practicable), being constantly aware of surroundings, keeping clear of unusual secluded areas and late night individuals in low light, little trafficked areas and doing anything within reason to avoid drawing their firearm.
The applicant is urged to never discuss the firearm, show the firearm, make carrying obvious or the fact that they are indeed carrying. Not friends, not family (if applicable), not fellow workers, not even your Priest, Pastor or Rabbi. Nobody.
Its very important that the applicant learn to assume the weight of the firearm as natural, something not noticed, not consciously aware of the weight or the fact that its even there. Its equally important to not be suspicious of every stranger, every situation of daily life, every sudden noise, every quick movement around you. The firearm should simply be another part of your body, not a conscious part but one to be called upon in the gravest extreme.
A successful applicant will not be constantly watching and waiting, expecting the worst. Carrying in itself typically makes the carrier more relaxed, more secure feeling, more responsible and far less likely to react violently or overreact.
Regular range time is strongly encouraged.
There are far more aspects to my course than can easily be presented here considering the typist has the will of a youngster and the fingers of an OldGuy. Push, step back, brace and draw etc. Many little and bigger things are presented in the course of the live classes. Bear in mind that this is not a Practical Pistol course but a base for self defense shooting. Other instructors may broaden the base of their courses and expand into related shooting exercises and events.
Its only important to remember that the final judge of the prospective course is you, the applicant. The responsibility for everything that occurs after the issuing of your CC with your firearm is your responsibility, and yours alone. There will be no instructor to stand by your side in a courtroom testifying as to the validity of the shoot. No instructor should ever present scenarios to a student. Its not remotely possible to present them all and the student's first confrontation would most likely be something never considered. Don't dwell on "what if"s. Ayoob's books present rational confrontation responses. I can only answer what I might do, not what the candidate should do.
Choose your teacher carefully and remember that if something doesn't sound reasonable and rational, it probably isn't.
Shoot straight, think carefully as quickly as you can and..........
....stay low.
- Details
- Written by P. St.Marie
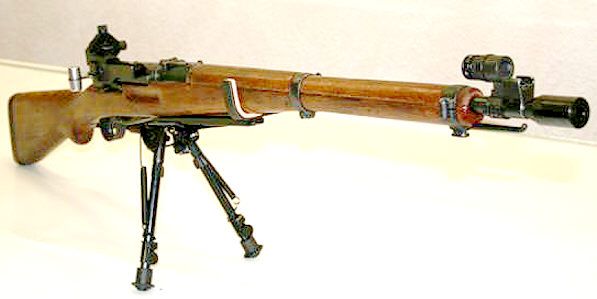
This was written for Swiss rifles, but it applies to all rifles including the ARs.
We manufacture brakes. (Note: We don't sell to the public, only through our distributors)
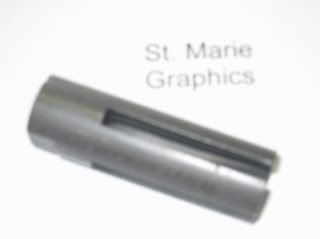
This is a threading kit with pilot.
This is a threaded brake, intended to reduce felt recoil.
Note the thickness of the Brake wall.
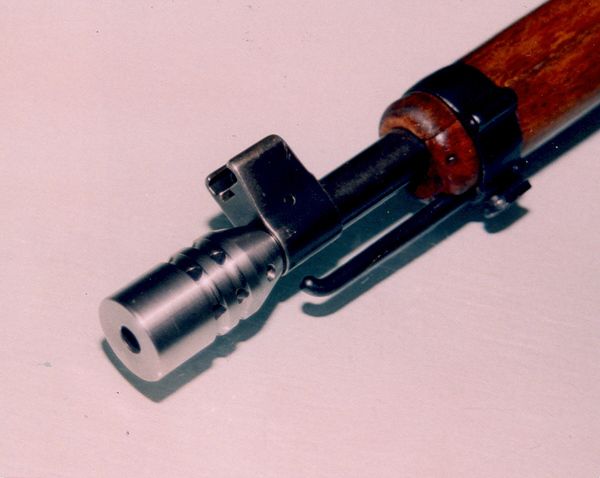
This is a Clamp On Brake designed with the same intent.
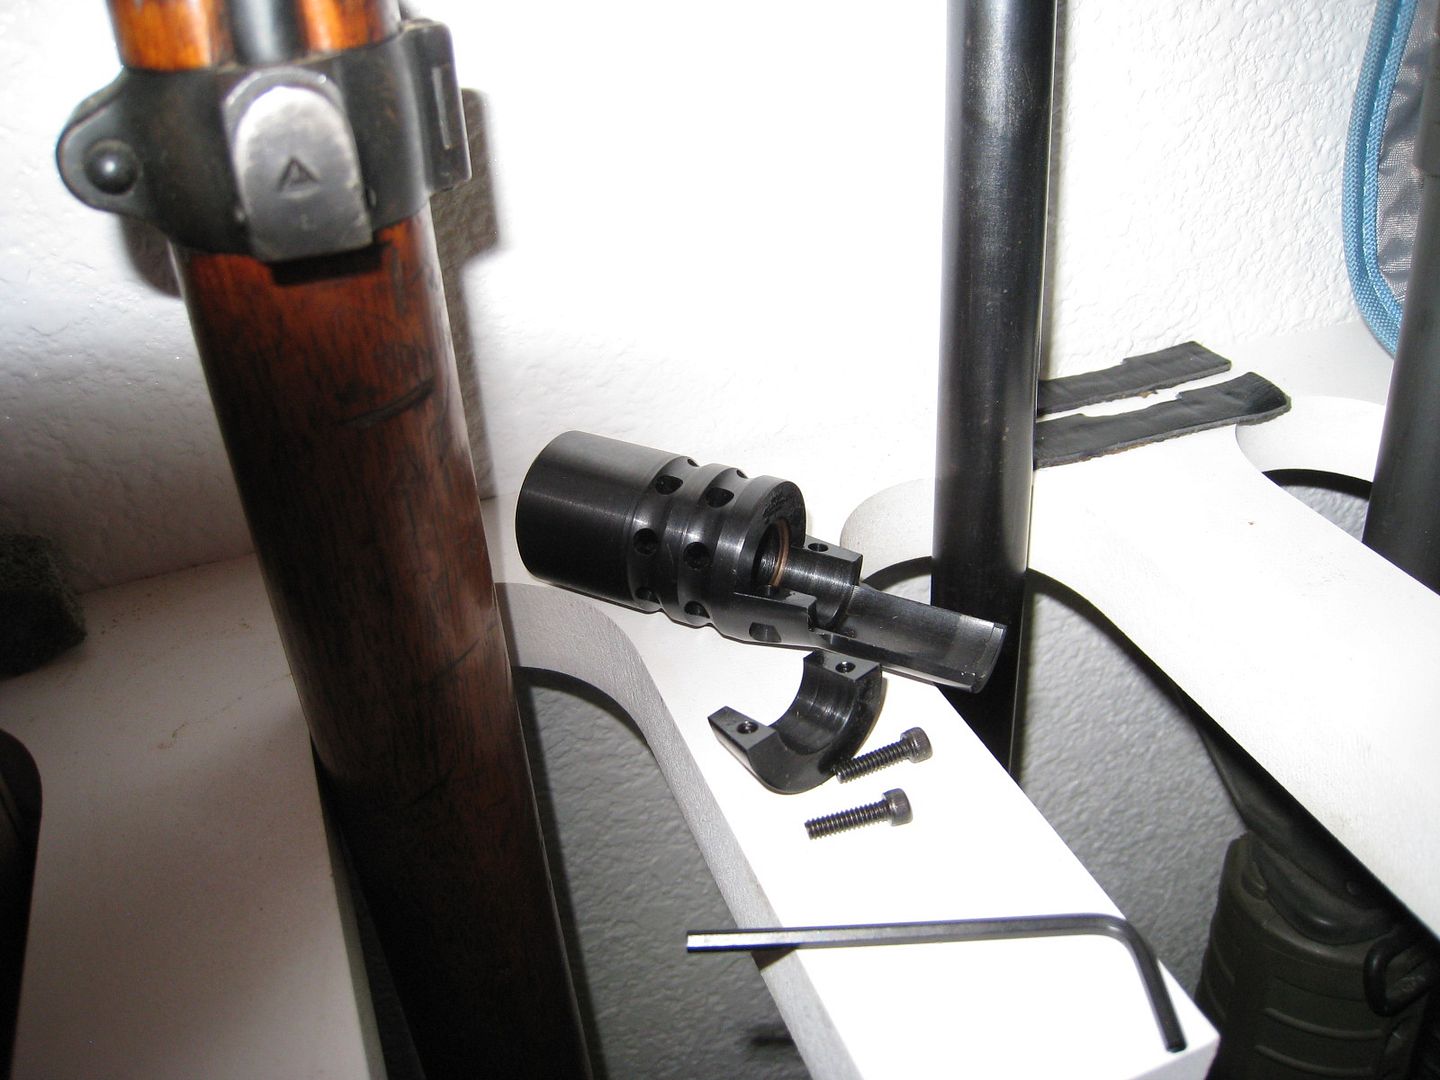
Installed
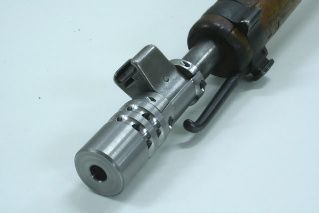
This is a threaded Damper, or Compensator for reducing group size. This unit is rifle, caliber, barrel length, ROT and projectile weight specific, that being 175gr.
Installed
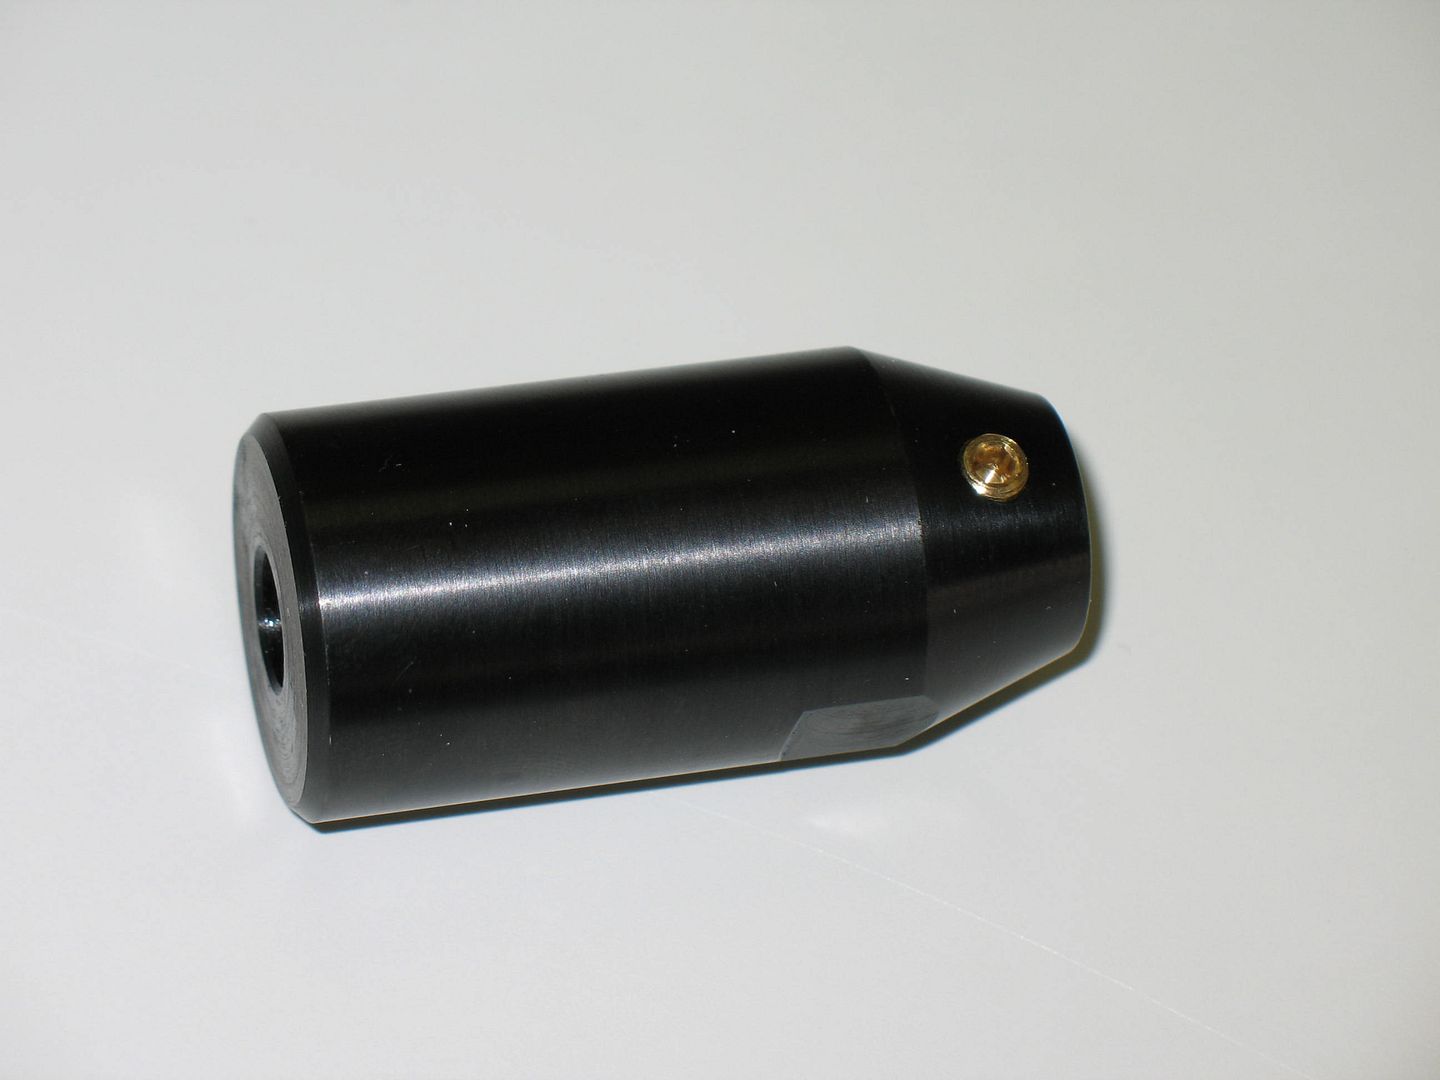
This is a flash suppressor. A Brennan Nil-Flash that shows zero signature on ar15 type rifles.
We did the prototype testing on this brake in Lost Prairie during the early 90's. It produce a zero flash signature.
This is an effective Flash Suppressor showing dispersion and lack of actual flash.
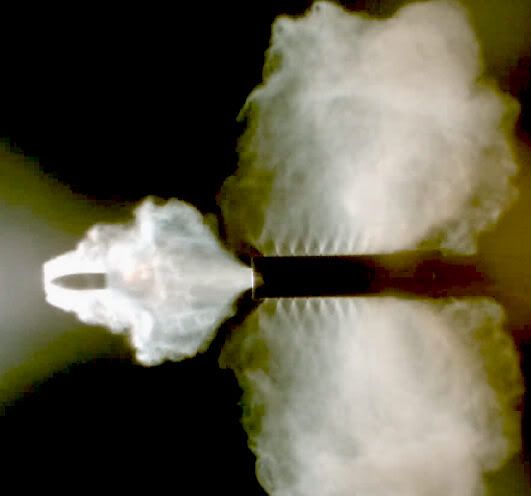
They're not a brake, and a flash suppressor (combo) is never an efficient brake.
4 years of field testing our own products before production and distribution has proven this over and over ad nauseum.
The chances of any brake reducing group sizes is low and purely co-incidental, however, we have had a few reports of the threaded brake making a difference. This is an involved subject and I'd post it if requested, otherwise what I've given you is based on a very long history of manufacturing, R&D and field testing on both Brakes and Dampers.
Essentially, a true, effective Brake must be thick walled right out of the gate. The rearward angle of the ports must have sufficient surface upon which the gases can act. Without that angle and thickness you'd have no forward push on the rifle. Look closely at your zfk55 or AMT, and you'll understand.
Bear in mind that for any Brake to work effectivley, the center must be concentric to the rifle's bore. Any deviation from concentricity will affect POI. This is especially important for Dampers (Compensators).
The truth of this statement is proven in our field tests with both threaded and clamp-on Brakes.
If the unit is to be threaded, the threader itself must have a bore pilot supplied for the threading operation. Without a pilot there can only be threading pertinent to the OD of the barrel. A pilot determines threading based on the ID of the barrel. That being the case, a clamp-on type brake centers itself based on the OD, and the Brake's opening must then be larger than that of the Threaded Brake to allow for the passing of gases without destablilizing the passing projectile.
Center concentricity is essential to maintain equal gas release around the base of the projectile. If a clamp-on brake is perfectly aligned in this manner, rest assured it's pure luck for that particular barrel/brake combination.
P. St.Marie
- Details
- Written by A.H.
As big game hunters and centerfire rifle shooters we like to overshoot our targets -- delivering more than enough energy to cleanly kill our target. However for small game hunting like squirrels, rodents, skunks or other pesky critters modern air rifles are more than capable of getting the job done without the cost expensive ammo or the loud report of a rifle or shotgun.
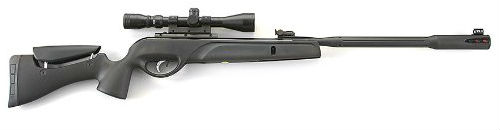
As a small game hunter you will probably still want the best. One of the best widely available pellet rifle manufacturers today is Gamo. Their newest air rifles use inert gas allowing a more lightweight air rifle. This removes the spring mechanism, minimizing recoil and further reducing its weight. All these qualities make this one of the best rifles for everyone.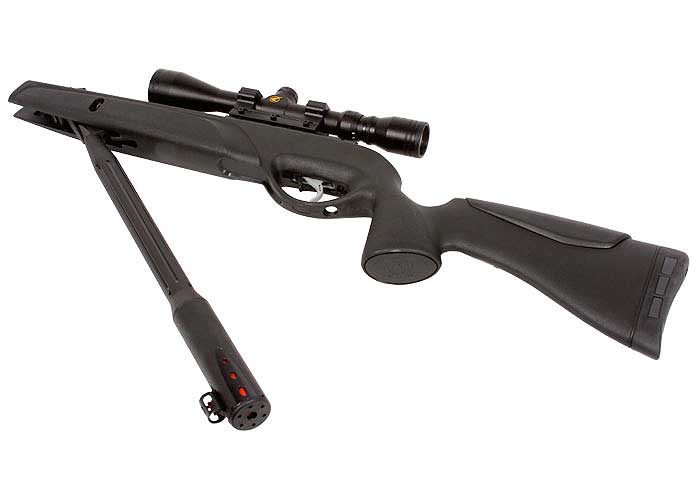
Distance
The distance of air rifles is grouped into four categories, light, medium, magnum and super-magnum. Light air rifles are intended mainly for use up to 35 yards, which make them great all-around general use for target shooting, pest control and animal hunting. Medium extends it to 50 yards and the two magnum classes extend it up to 80 yards for precision targeting. Picking off a squirrel from 80 yards in a tree at night is a notable achievement for any marksman.
The following Gamo air rifles fit the bill for the even the most discerning small animal hunter:
With 5 in the series, the options are plentiful. Used as a great small game hunting rifle and great with pest control this series has some top notch options for making sure your hunting goes as planned.
Gamo raised the bar with this series. With the new raised rail scope it goes beyond what most air rifles can offer in scope technology. As well, when the scope is attached it cannot slip backward or forward on the rail, a large issue with other rail scopes. This series has been often remarked as the best series Gamo has ever made.
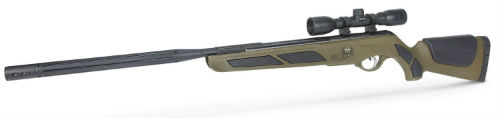
SOCOM
One of their best-selling series, the Socom series comes in 6 different combinations including: Extreme, Tactical, Carbine, Carbine Elite, Extreme .22 cal, Extreme .25 cal. These guns provide sizzling velocity especially when paired with match grade accuracy ammunition.
This is one of their best series for small game hunting, not so much for the rifle as for the accessories that come with it. These include mountable onto the scope flashlight and laser pointer for better accuracy during nighttime’s hunting.
Based on the TV series these weapons are very popular for reasons other than their TV fame. They use revolutionary new inert gas technologies that quiet the shooting by more than 50%, lowers its weight and recoil during shooting.
As small game and varmint hunters go, you still want a reliable air rifle. With any of the choices above your small game hunting will go smoothly, time and again.
- Details
- Written by Bill Bernhardt
August is fast coming to a close, thus ushering in September and the opening of bow season for deer in many states. However, most avid deer hunters will agree that bow hunting for deer is a relatively close range proposition. So, how do you get that big buck close enough to your stand to make that perfect shot? Well, my answer to that question is to use deer scents.
In fact, if you visit any sporting goods store just prior to the opening day of deer season you will see a large selection of various types and brands of deer scents on their shelves. However, the selection in some stores can be so overwhelming that you find yourself unable to make a choice due to information overload. Therefore, in order to prevent this state of debilitating indecision, it is helpful to know what type of scent you are after before you ever enter the store. But, in order to do that, you need to be aware that deer scents are divided into four separate and distinct types: deer lures, mock scrape lures, food attractant scents, and cover scents.
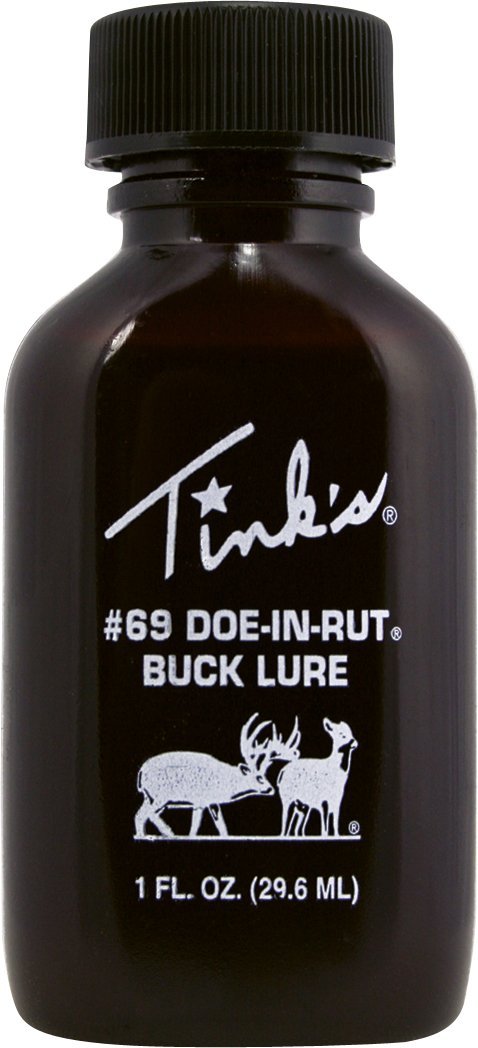
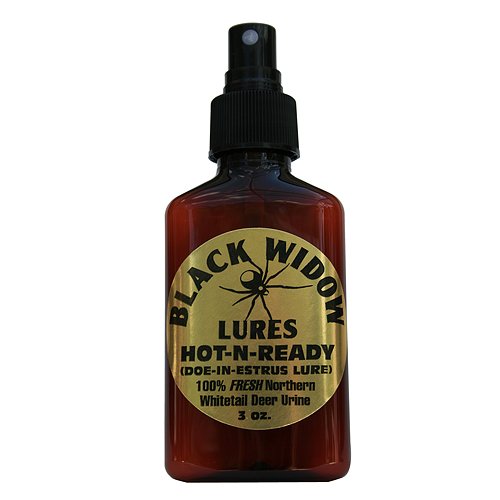
Therefore, first we should examine deer lure scents because they are by far the most popular type of deer scent. However, be aware that this category of deer scent has two sub-categories which consist of both urine scents and glandular scents. Urine scents most often consist of either doe urine such as Tink’s Doe-P or Code Blue Whitetail Doe Urine or doe-in-estrus urine such as Tink’s #69 Doe-in-Rut or Code Blue Doe Estrus Urine or dominate buck urine such as Tink’s Trophy Buck Lure or Code Blue Whitetail Buck Urine and they are generally applied to either the soles of your hunting boots or to a rag which you drag behind you as you walk into your stand. This creates a scent trail that often causes any deer that crosses said trail to turn from their intended course in order to follow the scent trail you have laid down and thus, lead them right to your stand or blind.
|
|
 |
 |
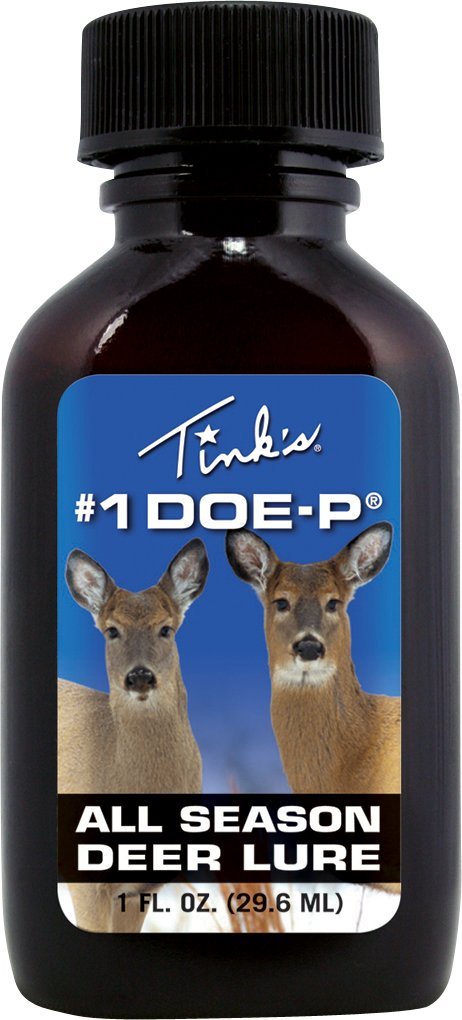
Tink's #1 Doe-P Deer Lure (1-Ounce)
Tink's #69 Doe-in-Rut Buck Lure (1-Ounce)
Black Widow Gold Label Hot-N-Ready Deer Lure - 3oz
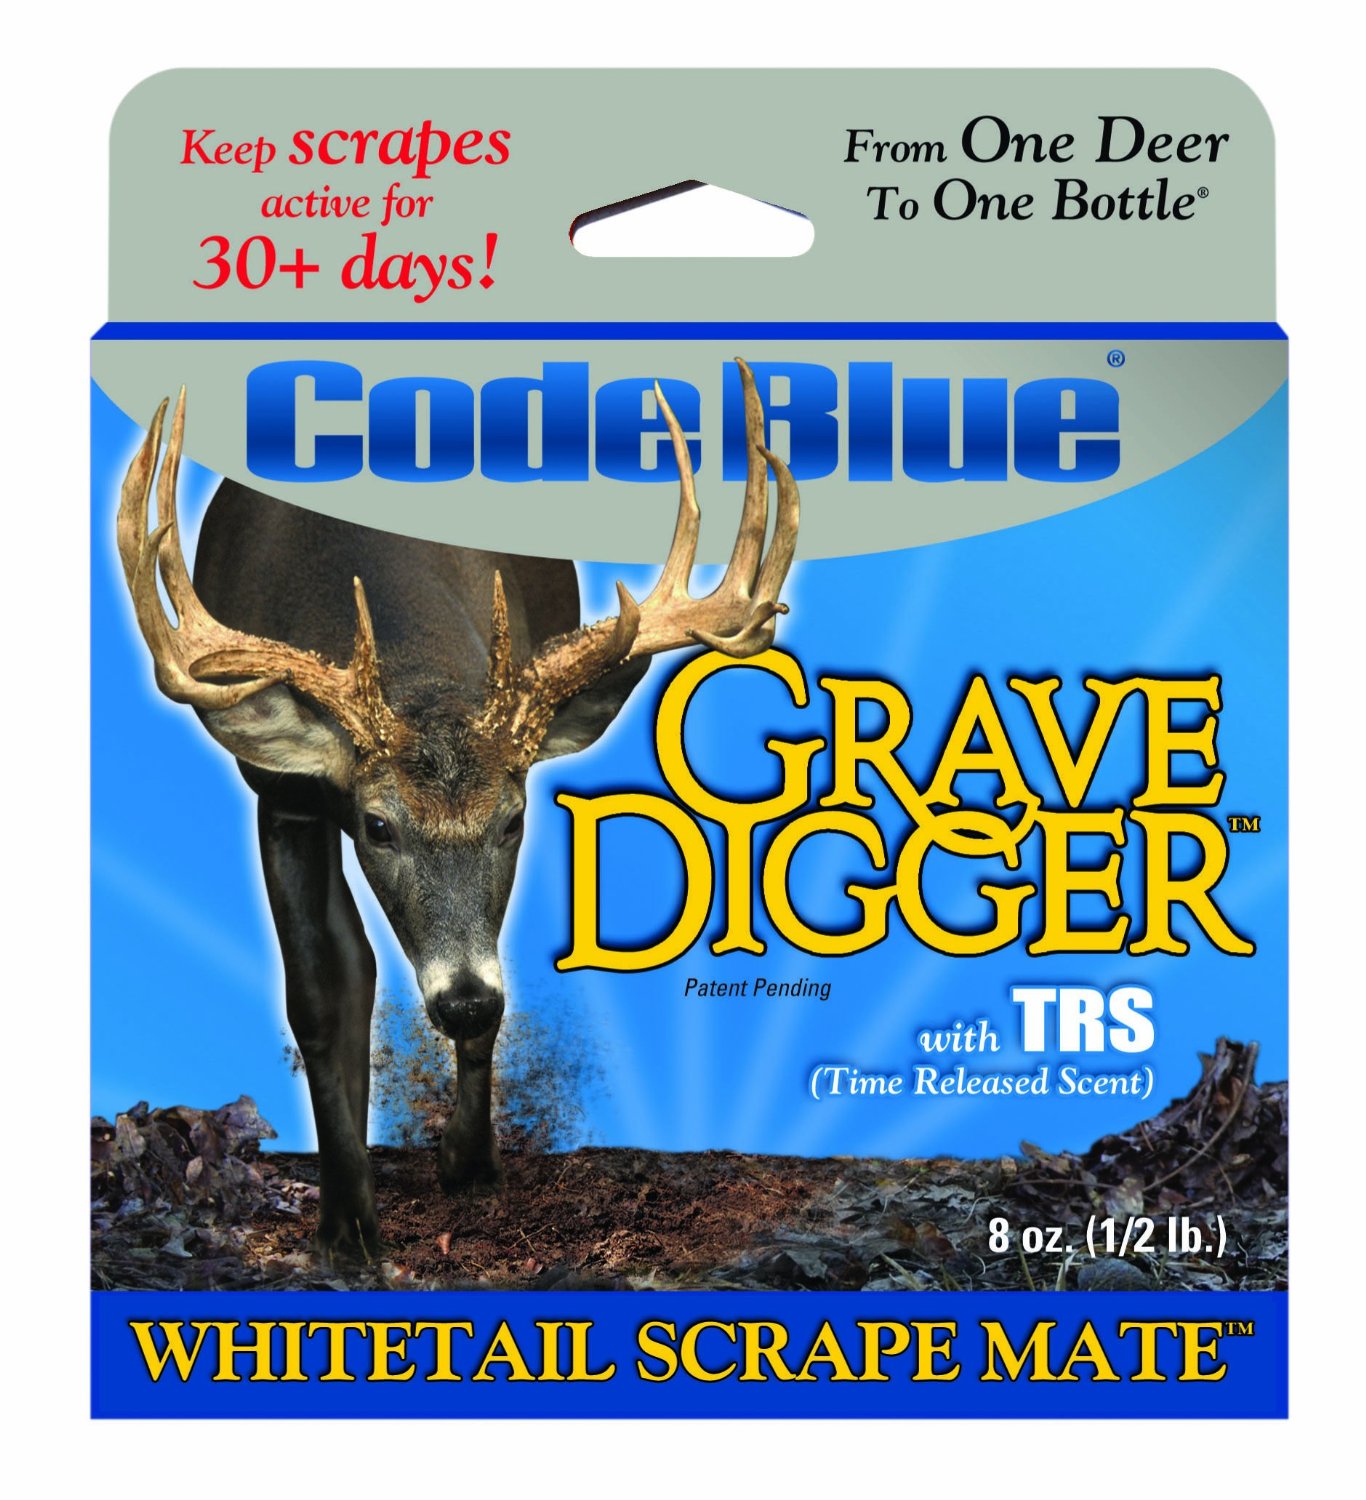
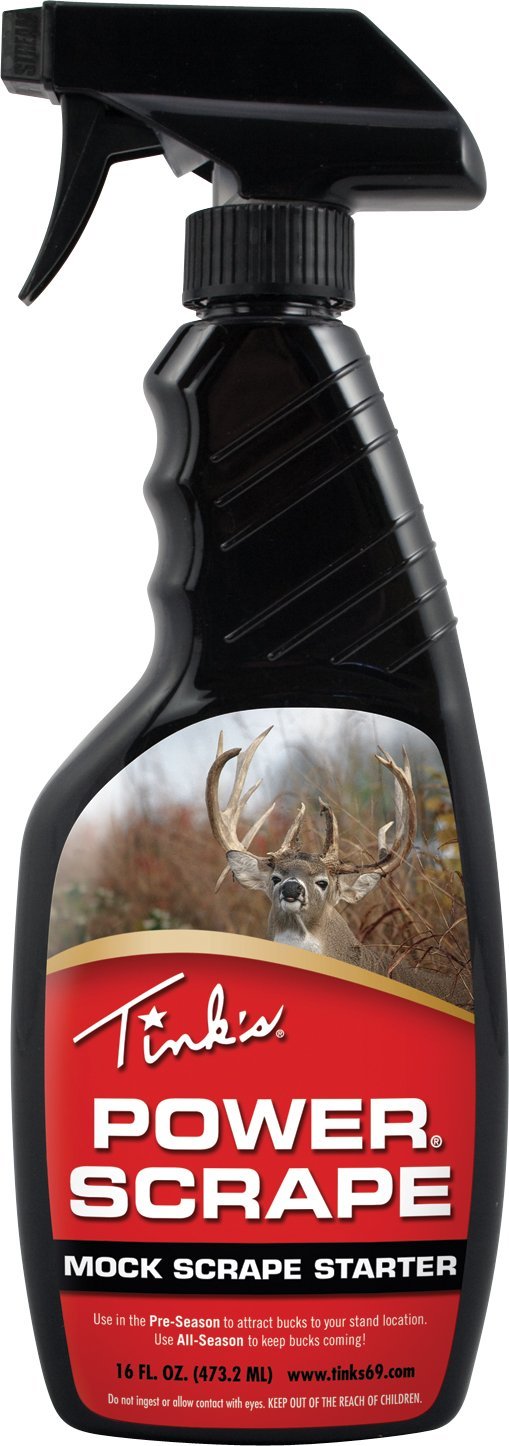
Next, we have a second category of deer lures made from glandular secretions such as Code Blue Rack Rub and Code Blue Whitetail Tarsal Gland. This type of scent most often consists of either Tarsal, Preorbital, or Interdigital glandular secretions and each one is designed to meet a specific purpose. For instance, by combining tarsal gland scents (taken from the glands located on the hind legs of mature, rutting, bucks) with dominate buck urine, we can create a powerful combination of scents which we can then use to either "doctor" a pre-existing scrape for to create an entirely new scrape. Plus, by rubbing Preorbital scents (taken from glands located on the deer's forehead) on the limbs above our "doctored" scrape or scrapes that we have created, we can cause any buck that comes to investigate our scrape to linger long enough for us to get a clean shot. Last, Interdigital scents (which are harvested from the glands between the deer's hooves) are also very useful for creating scent trails which will lead deer to our tree stands or ground blinds. Some other useful products that are also designed for this particular purpose are mock scrape scents such as Tink’s Power Scrape and Code Blue Scrape Mate which are designed for the same purpose as the above mentioned scents.
 |
 |
 |
Code Blue QA1228 Rack Rub 2oz Gel
Tink's Power Scrape Starter 16-Ounce Spray Bottle
Code Blue Grave Digger (1/2-Pound)
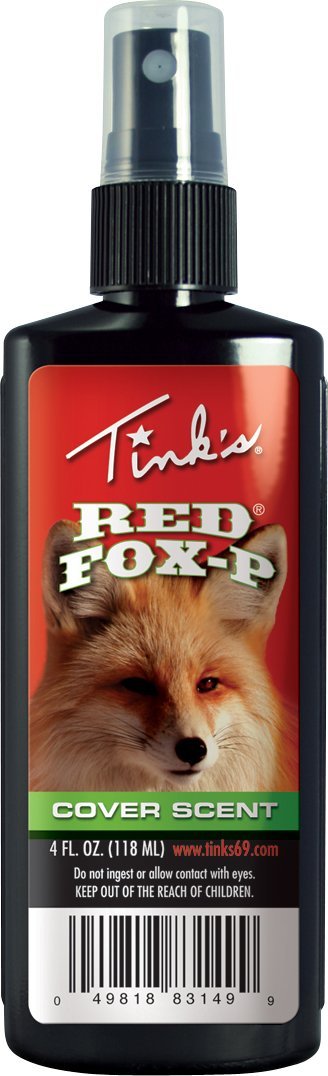
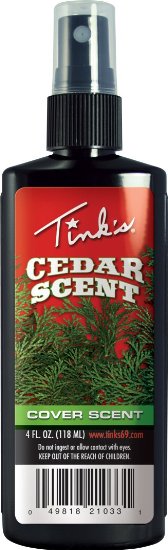
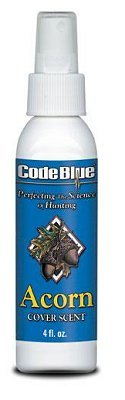
A third category of deer scents is that of cover scents. More specifically, cover scents are scents that are used to help mask or conceal our human odor from the deer. Thus, the main idea behind cover scents is to overwhelm our human odor such that we smell like something that naturally exists in the deer's habit but, which is non-threatening to them. Therefore, cover scents usually consist of animal urines such as Tink’s Red Fox-P, Tink’s Bandit Coon Urine, and organic cover scents such as Tink’s Acorn, Pine, Cedar, and Earth cover scents.
 |
 |
 |
Tink's Red Fox-P Power Cover Scent (4-Ounce)
Tink's Cedar Power Cover Scent (4-Ounce)
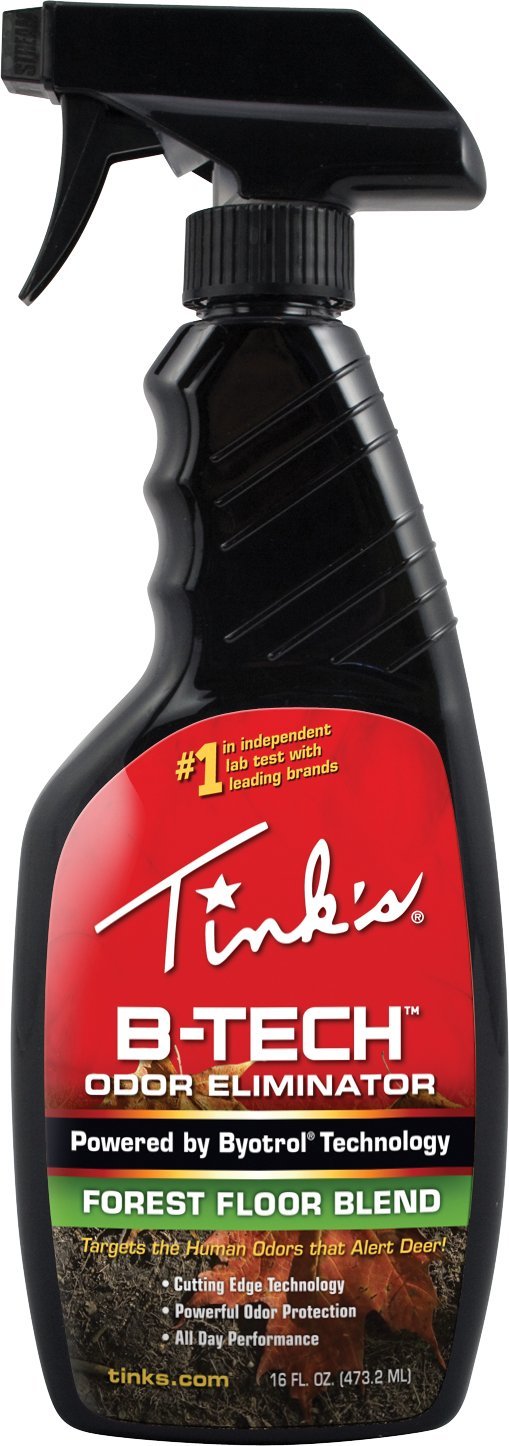
Tink's B Tech Odor Eliminator Spray Forest Floor Blend (16-Ounce)
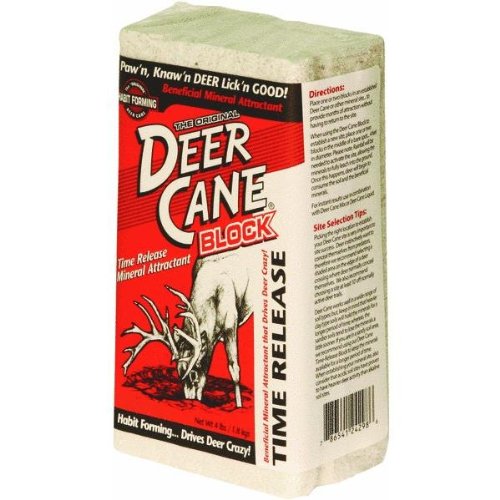
A fourth type of deer lure scent is that of food attractants. Food attractants consist of such products as Tink’s Sweet Weed and Salad Dressing scent and Code Blue’s Apple Swig and Corn Craze. However, like cover scents, it is important to use an attractant scent that is appropriate to the area that you are hunting. Another popular type of food attractant is the type which is poured onto the ground to create a mineral lick such as Deer Cocaine. All animals need certain minerals in order to survive (such as salt) and thus, mineral licks are extremely popular amongst many types of animals once they are discovered.
|
|
 |
 |
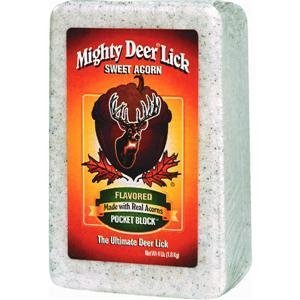
Mighty Deer Lick 22340 Sweet Acorn Salt Lick Block
Evolved Habitats Deer Cane Block
Evolved Habitats Buck Grub Accorn Quick Attractant
Also, it is important to be aware that different types of scents are used indifferent manners. For instance, urine scents are most often sold in liquid or gel form which is then applied sparingly to the soles of your hunting boots or to a rag which you then drag behind you while on the way to your stand in order to create a false tail for the deer to follow. On the other hand, the various types of cover scents are available in both liquid form (which is meant to be dispensed on a rag and then hung near your stand) and in solid form as impregnated plastic wafers which you then attach either to your clothing or to a tree branch adjacent to your tree stand. In addition, when choosing cover scents, it is very important to choose a scent that is appropriate to the area in which you are hunting. For instance, apple, persimmon, and acorn scents often work well in eastern deciduous hardwood forest but are not appropriate for use in western or northern evergreen forests. In addition, sweet corn scents often work well when hunting on the edge of agricultural fields but they are not appropriate for hunting in either deciduous or evergreen forests.
So, now that you know a little bit about deer scents and what type of scent to use in what type of situation, you can now make an educated decision about what type of scent would best suit your particular purposes and thus, avoid the sensory overload that comes from having too many choices without enough information to sort them all out.
- Details
- Written by A.H.
If you are a camping enthusiast then you know that finding great camping locations can be incredibly rewarding; however, sometimes it is a trial and error effort. Especially if you are looking for locations that can be accessed but are remote enough to actually feel like you and nature are alone. Tired of reaching your ‘remote’ camping or hiking trail only to find that there are 6 other groups or hikers already setting out? Your trip of solitude, or primal hunting adventure just took a terribly bad turn. This article will point to some of the least traveled nature reserves, parks or trails where you can truly get a sense of nature with only your group.
True remote camping should be done in areas that are obviously remote. One of the best places in North America to accomplish this is to start visiting Canada. Canada is the 3rd largest country in the world, with a small population of only 34 million people in that territory. Here are a couple camping opportunities in Canada that the faint of heart should not even attempt.
Terra Nova National Park of Canada, Newfoundland

This area of the ‘the rock’ as Newfoundland is affectionately known to most islanders is a fairly remote national park with long inlets of water that separate the park into different areas. These rocky headlands provide shelter from the open ocean. You can fly into an international airport and drive to the gates of the park. Although camping is restricted to designated sites the Lion’s Den South campsites part of the Outport Trail is very remote. This area only has 3 campsites and includes a 22 km (14 mile) hike into the camping areas. Fires are not permitted and the sites are also accessible by kayak. If you want a truly solitary experience you can also make this same camping trip in the winter when there is no park service onsite and campers throughout the entire park is very minimal.
Willmore Wilderness Park, Alberta

When looking for a hiking trail near Banff or Jasper it is sometimes hard to find something that is not full of tourists, especially if you are not sure where to go. The Rocky Mountain range is huge with tons of opportunities. Willmore is often suggested by park rangers for the more adventurous that require more solitude. A note of caution: make sure that you by-pass the regular hiking trails as there are a lot of outfitters that take regular horse trips into this area. You are better off to follow these trails in (usually as they are the only trails) and when they end your true trip begins. There are no campsites beyond these early trails; you simply need to pick a site as your base camp. The best advice is to then hike out of your base camp for daily hikes to the ridgelines or basins that dot the landscape, often into unspoilt wilderness with no hiking trails, horse trails and sometimes not even a game trail.
These two backcountry camping spots are accessible by air and road; travel to the gates of wilderness paradise. However, there are even more remote areas in Canada that require special permits and are fly-in only. These parks include Polar Bear Provincial Park in Ontario and Torngat Mountains National Park in northern Quebec and Labrador. These places make remote backcountry camping look like a stroll through your local park.
Show 'em Off!
Add your rifle to the AR-10 Photo Thread!
All content of this site is copyright 2003 - 2017
AR-10(T)™, AR-10™, are trademarks of ArmaLite, Inc.®
AR10T.com is NOT endorsed or affiliated with ArmaLite, Inc.®
About AR10T.com
AR-10(T) is a community focused on rifles, optics, scopes, gear, accessories, and components used by the professional operator and skilled marksman. Enthusiasts, shooters, and gunsmiths alike contribute to our gallery, articles, and reviews Thank you for visiting!